Additional information may be found in the textbook in chapter 2,
section 2.4 on pages 36-40.
In lab1 you drew orbits for the planets in
the solar system as circles with your compass. We know that the orbits
are ellipses from Kepler's first law:
The orbit of a planet about the Sun is an ellipse with the Sun
at one focus.
A circle is a special type of an ellipse, just as a square is a special
type of a rectangle. In this lab you will learn the different parts of an
ellipse by constructing one on your paper.
Constructing an Ellipse:
Page 5-5 in your labbook asks you to draw an ellipse of a comet's
orbit around the sun. The directions on page 5-1 describle how to
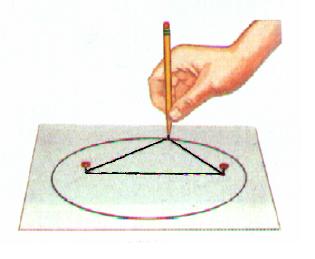
constuct this. Insert thumb tacks or push pins are inserted at the two
focal points given on page 5-5 and place a loop of string around them.
When drawing the ellipse with the string, make sure that your pencil is
straight up and down, as shown below.
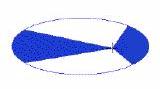
When you finish drawing the ellipse, it should look something like the
following diagram, with holes at the focal points from the pins:
Parts of an Ellipse:
There are several parts to the ellipse that you must be able locate
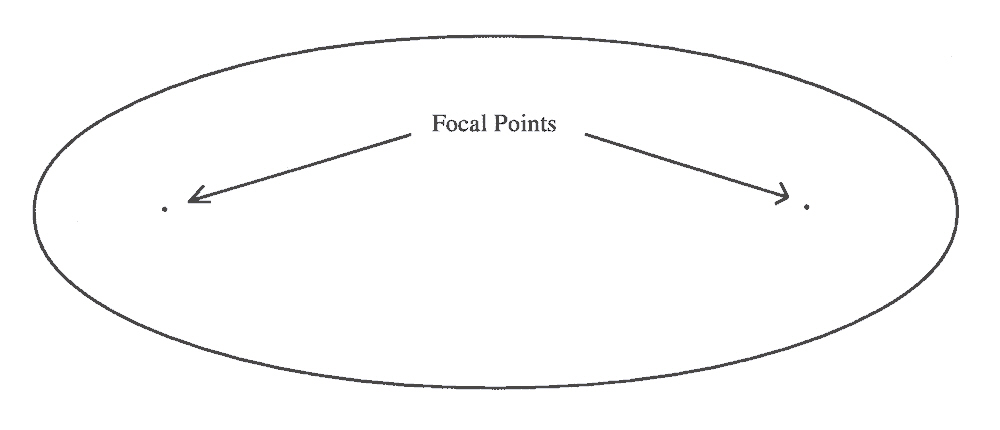
and describe. The first of these parts are the focal points. You
already know where they are from the pin holes. For an actual comet
orbit, the sum is at one of these focal points, so pick F1 or F2 and label
it "Sun." There is nothing sitting in space at the other focal point.
We know mathematically that is there, but there is nothing physically in
its place.
The next part that you must know is the major
axis. This is a line that goes through both of the focal
points from one side of the orbit to the other. There are two important
points along the major axis in addition to the focal points. Look at
where the axis crosses the orbit itself. The closest of these two points
to the sun is called perihelion and the farthest point from the sun
is called aphelion. Find these points on your orbit and label them
as well as labeling the major axis.
NOTE: Peri- and ap- are
prefixes and the rest of the word describes what is being orbited.
Since the Sun is being orbited in this case, the points are
called perihelion and aphelion, with helion
refering to the Sun (Helios). If the Earth was at a focal point
instead of the Sun, the points would be named perigee and
apogee, and if a star was at the focal point, the points
would be called periastron and
apastron.
Another important line in the ellipse is the
minor axis. This line is perpendicular to the major
axis and divides the major axis directly in half. What you need to do is
measure the major axis to find the center of it and then draw a line at
this point that is turned 90o from the major axis. This will
be your minor axis. Draw and label this line for your ellipse.
Once you find the major and minor axes, you can make a few measurements
and learn a lot about the orbit you have drawn. The distance from the
center point to either perihelion or aphelion is called the
semi-major axis. This is the distance
of half of the major axis (semi=half) and it is usually called
"a." The distance from the center
point to either of the focal points is called "
x." Both a and
x are measured in AUs. Find and label
these distances on your drawing.
If you know a and
x, putting them in a simple ratio will allow you to
calculate the eccentricity, e,
of the ellipse. This means, you calculate how flat the ellipse is from a
circle. If the two focal points were on top of each other, then you would
have a circle, and the eccentricity would be 0. If you stretched the
focal points out as far as the string would allow, you would basically
have a straight line and the eccentricity would be close to 1. Since
e is a ratio defined this way, it will
never be bigger than 1 or smaller than 0:
e =
x /
a
0 <e < 1
Since e is a ratio, there are no
units on it.
Kepler's Laws and the Elliptical Orbit:
From your drawing, measure the perihelion distance (distance from the Sun
to perihelion), the aphelion distance (distance from the Sun to aphelion),
the major axis,
x, and
a in cm and use the conversion given in your book (1 cm = 1
AU) to convert them into AU. Calculate the eccentricity of your orbit and
then find the period. Remember, P is measured in years.
The Moon's Orbit:
In the back of your labbook, in the little folder of handouts, there
is a reprint from Sky and
Telescope that has photographs of the moon taken over a span of
about a month. The directions ask you to measure the diameter of each of
the moon pictures. The moon itself is not changing in diameter, but keep
in mind that its orbit is elliptical. That means that at certain times in
the orbit (i. e., perigee), it will be closer to the Earth than at other
times in the orbit (i. e., apogee). When it gets closer to us, it looks
bigger, and when it is farther away, it looks smaller.
When you measure the first couple of moon pictures, and the last couple,
the authors have tried to help you by providing a dot for the center of
the moon. Remember that the diameter is a line that goes from one side of
a circle to another through the center. Other things to remember about
measuring diameters is that the diameter is always the longest distance
from one side to another and it does not always have to be vertical or
horizontal, as long as it goes through the center. On some of these
photographs it is easier to measure at an angle other than straight
up-and-down.
After you finish measuring all the moons, the book gives you directions on
how to scale those measurements (D) so you can draw the orbit on the graph
paper provided for you. Once you have converted the measurements with the
scale factor, average them and write the average D value (Davg)
at the bottom of Table I so you can use it later.
On page 5-6 you will find polar graph paper. This uses concentric circles
to measure distances rather than squares. You will use this to graph the
orbit of the moon. The + in the center of the page represents where Earth
is. Coming from the center of the page outward you will find several dark
lines. These lines have degree markings at the ends. Remember that there
are 360o in a circle. The degree lines represent every
10o of the circle and there are 9 lighter lines in between the
dark ones. If you look around the edges of the page you will see that the
degree lines are labeled from 0o to 350o, starting
at the bottom of the page.
Figure 1:
When you measure the perihelion and aphelion distances, they are each
measured from the sun to the edge of the orbit along the major axis. As a
check you should be able to add these two numbers together and get the
length of the major axis.
Perihelion, aphelion, major axis, x, and a should all be measured in AUs.
Use the scale of 1 cm = 1 AU for these measurements.
Calculate the eccentricity: e = x / a . Think about the units before you
write anything down.
Calculate the period of the orbit. P 2 = A 3 To get
P instead of P 2 you have to find P 2 and then take
the square root of that answer.
Polar graphing:
Look at the different columns in Table I. There is one column with
longitude measured in degrees. You will be graphing this column and the
last one, the scaled distance (D) in millimeters. The first moon position
is at 270o and about 85 mm (NOTE: the
moon is not exactly at 85 mm; this is an example. You are asked to
measure the distances to a tenth of a millimeter). To plot
270o and 85 mm on the graph paper, find the line marked
270o. Put your ruler along this line with 0 lined up with
Earth. Measure out 85 mm and put a dot on the line. Use the same
procedure for the other eleven points. When you finish, you should have
twelve dots going around Earth.
The next thing you are asked to find is the center of the orbit.
Remember that the Earth is at a focus of the ellipse, not the
center. Open your compass to the Davg value that you
calculated. Use your ruler to set your compass, not the scale on the
side. Put the point of the compass on any of the dots that you graphed.
Draw an arc in the center of the dots, near Earth. Then pick another dot,
somewhere else on the orbit. Draw another arc so that it crosses the
first one. Repeat at least one more time. You should notice that the
arcs are crossing near each other, but not exactly at the same place.
They should trace out a little triangle, though. In that triangle is the
center of the ellipse. Mark it with a dot. Leaving the compass set to
Davg, put the point of the compass on the center that you just
found and draw a circle. This is the orbit of the moon. The circle that
you draw should come close to the dots that you plotted, but it will not
hit all of them. They were just used as a guide.
Once you have drawn the orbit, you can now draw the major and minor axes.
Remember that the major axis goes through the focal points and the center.
You have one focal point (Earth) and the center. This is enough to draw
the line. The minor axis goes through the center and is perpendicular to
the major axis. Make sure that you draw the minor axis at a
90o angle from the major axis. You are also asked to label
perigee and apogee. Remember that these are on the orbit along the major
axis. Think about where they go in relation to the Earth.
Step 9 says to measure x and a in millimeters and write them in the blanks
at the bottom of the graph. Then calculate e, where e=x/a.